
How to Solve a Motherboard’s Red Light Error
Encountering a red LED light on your motherboard can be alarming, especially when your PC refuses to function properly. While it might initially seem like an aesthetic feature, the red light often signifies hardware issues that require attention. This guide will help you understand what the red light indicates and provide practical steps to troubleshoot and resolve the issue.
Understanding the Red LED Light on a Motherboard
Why Does the Red Light Appear?
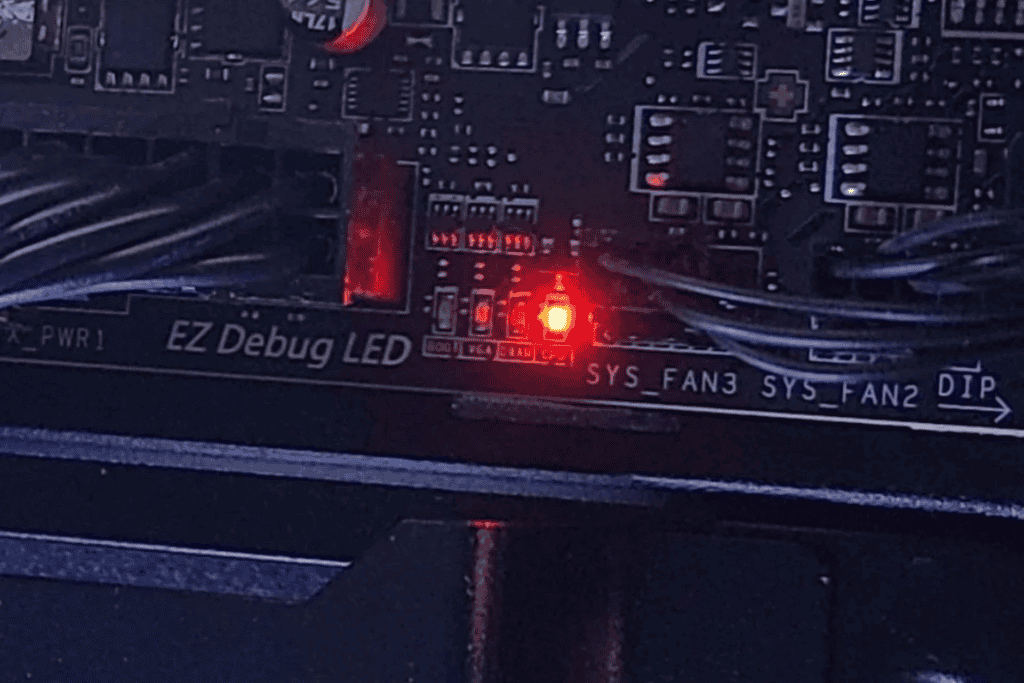
The red LED on your motherboard is typically a diagnostic tool. Manufacturers include this feature to indicate problems with critical components such as the CPU, RAM, GPU, or power supply. The light may stay on, blink, or appear during specific operations, each behavior indicating different issues.
Initial Reaction to a Red Light
When you notice a red light:
- Don’t panic. It doesn’t always mean a major failure.
- Consult the motherboard manual for specific details about the light’s meaning.

Manuals and Diagnostic Tools
Modern motherboards often come with user manuals and additional diagnostic tools such as beep codes or onboard displays. These tools can help pinpoint the issue more precisely.
How to Fix the Red Light Issue
1. Check the Motherboard Manual
A motherboard manual is your best friend when troubleshooting. Follow these steps:
- Locate the Manual: Check the box your motherboard came in, or visit the manufacturer’s website for a digital version.
- Study the LED Indicators: Look for a section that explains LED behaviors and their meanings.
- Identify the Problem Area: Note if the red light indicates an issue with the CPU, RAM, GPU, or power supply.
Pro Tip: Some motherboards have multiple LEDs for different components. Knowing the specific LED’s meaning can save time during troubleshooting.
2. Inspect Your System
a. Check Cable Connections
- Ensure all cables are securely connected, especially the power supply cables to the motherboard and GPU.
- Loose or damaged cables can trigger the red light.
b. Examine for Damage or Overheating
- Inspect components for physical damage or burn marks.
- Feel for excessive heat around the CPU or GPU, which could indicate cooling issues.
c. Test Your Power Supply Unit (PSU)
- A failing PSU can cause red light errors. Use a PSU tester or swap it with a known working unit to confirm.
3. Reset the CMOS
Resetting the Complementary Metal-Oxide-Semiconductor (CMOS) can often resolve configuration or BIOS-related issues.
Steps to Reset the CMOS:
- Power Off the PC: Unplug the power cable.
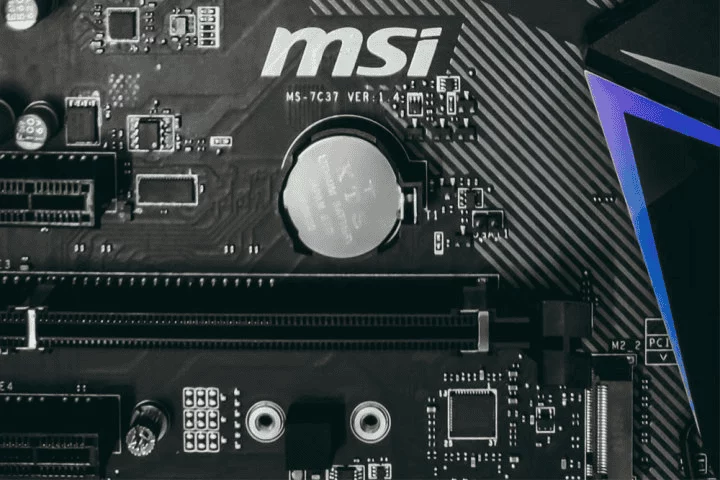
- Remove the CMOS Battery:
- Locate the small round battery near the CPU socket.
- Remove it carefully.
- Discharge Power:
- Press and hold the power button for 30 seconds to clear residual charge.
- Replace the Battery: Insert the CMOS battery back into its slot.
- Power On the PC: Check if the red light persists.
If your motherboard has a BIOS reset button, use it for a quicker solution.
Note: Resetting the CMOS will restore BIOS settings to default, which may fix conflicts caused by recent changes.
4. Reinstall Hardware Components
a. CPU
- Remove and Reinstall the CPU:
- Carefully detach the CPU cooler.
- Lift the CPU socket lever, remove the CPU, and inspect for bent pins.
- Reinsert the CPU and secure it properly.
- Check CPU Cooling:
- Ensure the CPU cooler is correctly installed and the fan is operational.
- Use fresh thermal paste if needed.
b. RAM
- Remove all RAM sticks and test one at a time in different slots.
- Inspect for dust or damage on the contacts.
c. GPU
- Ensure the graphics card is seated firmly in its slot.
- Verify the power cables connected to the GPU.
5. Update BIOS
Outdated BIOS firmware can cause compatibility issues, especially if you’ve recently installed new hardware.
Steps to Update BIOS:
- Visit the Manufacturer’s Website:
- Download the latest BIOS update for your motherboard model.
- Follow the Update Instructions:
- Use a USB drive to transfer and install the update.
- Reboot and Test:
- Check if the red light issue is resolved.
Additional Troubleshooting Steps
Simplify Your Setup
- Remove Unnecessary Components:
- Disconnect extra RAM, storage drives, or add-in cards.
- Boot with only the essential components (CPU, one stick of RAM, and GPU if needed).
- Check Connections Again:
- Re-seat all components and reconnect all cables.
Test Components Individually
- Test your CPU, RAM, and GPU on another compatible system if possible.
- Replace suspected faulty parts with known working alternatives.
Seek Professional Help
If the issue persists after trying all troubleshooting steps, consult:
- Technical support from the motherboard manufacturer.
- A professional technician for in-depth diagnostics.
Conclusion: Fixing the Red Light Error
The red LED light on your motherboard is a diagnostic tool designed to help identify hardware issues. Follow these steps for effective troubleshooting:
- Check the manual to understand the meaning of the red light.
- Inspect all connections and components for damage or loose connections.
- Reset the CMOS to resolve BIOS-related problems.
- Reinstall and test hardware components like the CPU, RAM, and GPU.
- Update BIOS firmware for compatibility with newer hardware.
If these steps do not resolve the issue, professional assistance may be required. By systematically following this guide, you can identify and address most motherboard red light errors with confidence.